
$19.95
High Realism Mixed Media Poppy Video Course
Give Yourself a Break... Immerse Yourself in the Quiet Creation of this Magnificent Poppy
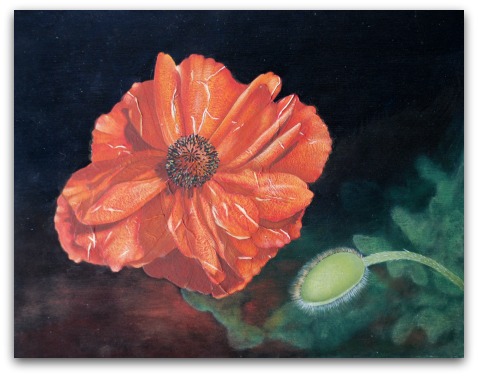
Surround yourself in the calm and quiet process of painting this poppy
The High Realism Poppy Project… is perfect for people who enjoy “losing themselves” in the creative process of painting.

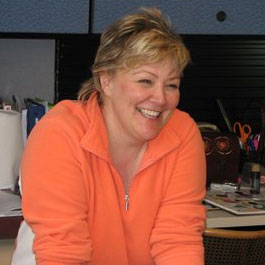
Hi, I’m Cheryl. I designed The High Realism Poppy Project... to help people like you relax and enjoy the process of creating a painting to be proud of.
If you’ve always wanted to…
Paint a stunning flower
Explore mixed media
Exercise your floating skills
Brush up on your dry-brushing techniques
Create details with the liner brush
Include decoupage into your creation
Seriously get into shading and highlighting
Lose yourself in the painting process
Float and Dry brush highlights
Execute a back-to-back float
Mix color on your brush
…then this course is for you!
In this 10 module program, I’ve included everything you need to know, including:
Getting Started
Welcome to the High Realism Poppy Project
High Realism Poppy Detailed Written Instructions
Introduction
Prepare the Background
Welcome to the High Realism Poppy Project
High Realism Poppy Detailed Written Instructions
Introduction
Decoupage the Flower
Lesson 2 Part 1 - Transfer flower shape onto paper
Lesson 2 Part 2 - Decoupage paper flower to the surface
Basecoat the Flower
Lesson 3 Part 1 - Undercoat the poppy
Lesson 3 Part 2 - Basecoat the poppy. Transfer the details and the pod.
Paint the Pod
Lesson 4 - Paint the pod to completion
Let's Start Painting the Poppy
Lesson 5 - Shade the petals to establish cast shadows and outline the petals.
Build the Flower Petals
Lesson 6 Part 1 - Dry brush highlights
Lesson 6 Part 2 - Tint the petal edges
Lesson 6 Part 3 - Float Highlights on Petal Edges
Lesson 6 Part 4 - Float Shadows on Petals
Create and Detail the Flower Center
Lesson 7 Part 1 - Add and Highlight Seeds
Lesson 7 Part 2 - Create textured highlights with a Liner brush
Decorating and Varnishing
Lesson 7 Part 1 - Add and Highlight Seeds
Lesson 7 Part 2 - Create textured highlights with a Liner brush
Wrap Up the Project
Project Wrap up
Secure Payment
Use your Credit Card or PayPal.
Enjoy the best payment security available on the web when you choose to pay using STRIPE or PAYPAL.
And... in the unlikely event that you are not satisfied with this course, I will refund 100% of your money.

Contents
High Realism Poppy Packet
In this section of the course you will get a brief introduction to the course.
Welcome to the High Realism Poppy Project . 5 mins . 156 MB
High Realism Poppy Detailed Written Instructions . 3.75 MB
Welcome to the High Realism Poppy Project . 5 mins . 156 MB
High Realism Poppy - Prepare the Background
Lesson 1 Part 1 - Slip Slap painted background with 2 colors . 6 mins . 334 MB
Lesson 1 Part 2 - Create a soft muted background and dry brush highlights . 15 mins . 1.15 GB
Lesson 1 Part 3 - Build visual texture and highlights . 11 mins . 571 MB
High Realism Poppy - Decoupage the Flower
Lesson 2 Part 1 - Transfer flower shape onto paper . 6 mins . 293 MB
Lesson 2 Part 2 - Decoupage paper flower to the surface . 7 mins . 311 MB
High Realism Poppy - Basecoat the Flower
Lesson 3 Part 1 - Undercoat the poppy . 3 mins . 134 MB
Lesson 3 Part 2 - Basecoat the poppy. Transfer the details and the pod . 3 mins . 135 MB
High Realism Poppy - Paint the Pod
Lesson 4 - Paint the pod to completion . 20 mins . 366 MB
High Realism Poppy - Let's Start Painting the Poppy
Lesson 5 - Shade the petals to establish cast shadows and outline the petals . 25 mins . 1.25 GB
High Realism Poppy - Build the Flower Petals
Lesson 6 Part 1 - Dry brush highlights . 20 mins . 416 MB
Lesson 6 Part 2 - Tint the petal edges . 11 mins . 217 MB
Lesson 6 Part 3 - Float Highlights on Petal Edges . 12 mins . 527 MB
Lesson 6 Part 4 - Float Shadows on Petals . 25 mins . 1.26 GB
High Realism Poppy - Create and Detail the Flower Center
Lesson 7 Part 1 - Add and Highlight Seeds . 12 mins . 242 MB
Lesson 7 Part 2 - Create textured highlights with a Liner brush . 8 mins . 160 MB
High Realism Poppy - Decorating and Varnishing
Lesson 8 Part 1 - Apply Decorative Stencil with Modeling Paste . 9 mins . 202 MB
Lesson 8 Part 2 - Complete stencils and varnish . 5 mins . 107 MB
High Realism Poppy - Wrap Up the Project
Project Wrap up . 2 mins . 31.6 MB
Bonus Guide
I realized that I shared a little trick I use to clean brushes during my video course. So I decided to add this bonus brush cleaning guide for your convenience.
Cleaning-Paint-Brushes-Guide . 613 KB
Now's the Time to Act
Imagine the joy you will have in painting and showing this poppy. No Risk Money Back Guarantee
With you each step of the way
Cheryl Poulin
Instructor and Guide
Hi, I'm Cheryl Poulin. I am your Instructor and Guide for these courses. I love to paint. It has brought me countless hours of joy.
I want you to experience that joy as well. That's why we are here together. I want to provide you every opportunity to develop your painting skills. I know you too will fall in love with this art form.
Here's all you need to know. You are not alone on this journey. I am with you each step of the way.
And anytime you need help, all you have to do is ask. I'll be here.
Finally, remember this is not a race. This is a beautiful journey of discovery and development.
Have fun. Let me guide you step by step
through these courses.
Enjoy,
Cheryl
FAQ
Q: Does this course have Live Classes that I must attend?
A: No, you can take this course on your own schedule. You can access it anytime, any day. It’s always there for you.
Q: Can this be painted on a round or oval surface?
A: Absolutely. Although I have designed and painted this on a rectangular surface, it can be easily adapted to a round or oval surface.
Q: What surfaces can this be painted on?
A: This project can be painted on just about any surface with the materials I have identified. However these paints will not work on glass so glass surfaces are out.
Q: What happens if I decide I don’t like it?
A: If, in the unlikely event, you decide this course is not for you, I provide a complete 30-day Money Back Guarantee. All you have to do is ask.
Q: Can this be painted using oils?
A: All my courses are designed for Acrylic paints. If you wanted to use oils, you would have to convert the colors and mix them yourself. Also, some of the techniques may not work as I describe if using oils.
Q: What happens if I need help?
A: I have a private Facebook page for my students that you can join. Once, there, you can ask me questions or ask other students. I also respond to emails that you may send or comments you may leave in the course itself.
Q: Is this project suitable for new painters who are just beginning?
A: I hate to say, “No” but this would be quite a challenge for a new painter. It might even be a source of frustration. I would not recommend it. But my new course to train new beginner painters will be launched later this year. So stay in touch.